5. Terrain Views地形视图
World Machine has a variety of views which provide a view of the current terrain. Some display the current render extents, while others view the entire infinite procedural world in which the render extents are defined.
World Machine有各种各样的视图提供给当前地形.一些显示当前的渲染范围,而另外的渲染范围被定义了显示全部的世界渲染
5.1 Leftside View 左侧视图
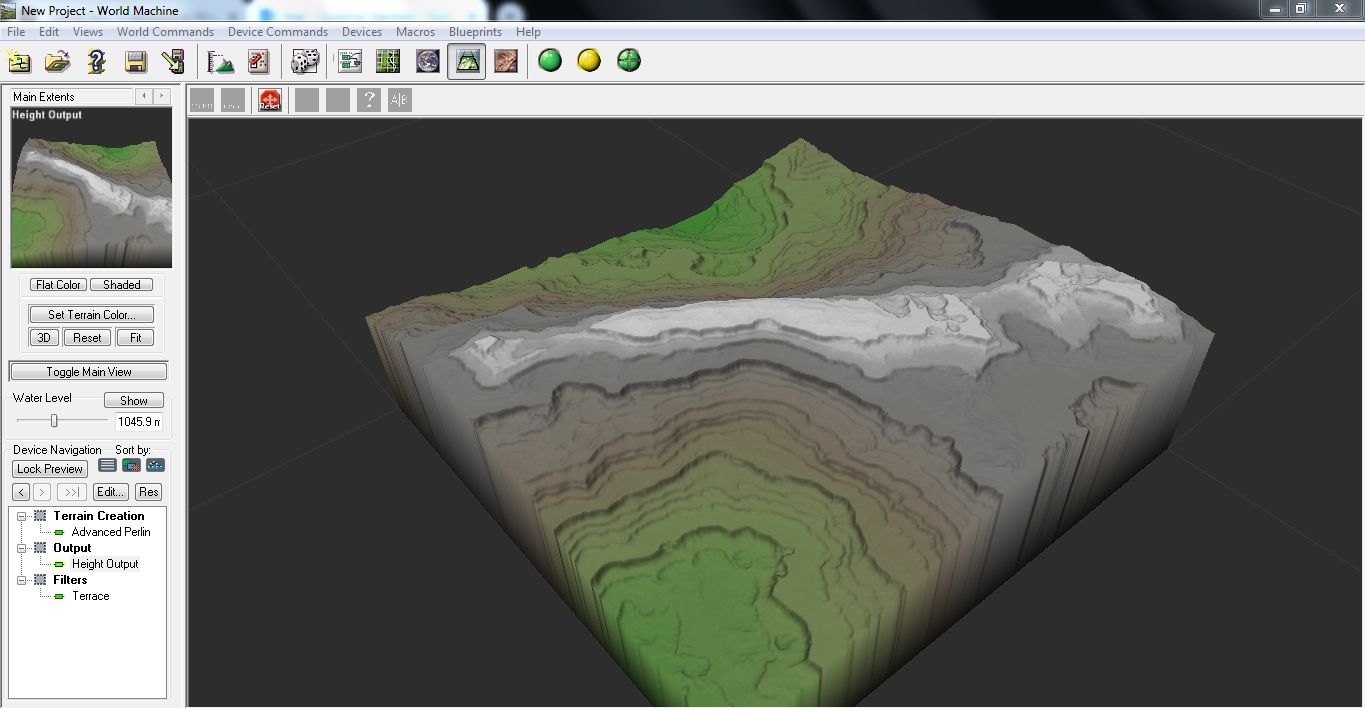
The “Leftside View”, as it is called, is the toolbar running vertically along the left side of the screen. The leftview can be shown and hidden by pressing the F4 key. For clarity, we will examine each section of the toolbar by itself.
因为这个工具垂直运行于屏幕的左侧,所以被叫做“Leftside View”.左视图可以通过键盘“F4”键来显示与隐藏.为了清晰可见,我们将审查本身的工具栏的每个部分.
Terrain Preview Window地形预览窗口
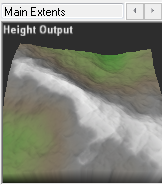
This window allows you to view a small, preview version of the current terrain area before it is built. This window is updated in real-time as you adjust device settings, allowing you to quickly see the effect your modifications have on the terrain.
在地形创建之前,你可以通过小窗口来查看预览,当前区域的视图变化.当你调整节点设置的时候,小窗口可以实时更新,使你快速的看见你修改地形后的效果.
Above the preview window, the name of the current render extent is displayed. Clicking the scroll arrows next to the name allows you to cycle through all of the currently defined render extents.
在预览窗口的上面.是当前渲染范围的名称.名称旁边的滚动箭头允许您通过所有当前定义的范围周期性的呈现.
The preview window can be set to either 2D or 3D mode. Depending on the mode, you may be able to perform different actions, shown below. To toggle the preview mode, click the “2D/3D” button below the preview window.
预览窗口可以设置2D或3D模式的一种.根据模式你可以执行不同的动作,你可以通过点击下面的“2D/3D”视图按钮预览窗口
The exact operation performed when you click and drag in the preview window depends upon your view navigation options. Click dragging will perform the following actions:
当你在预览窗口里根据下面的导航选项点击拖拽时,将执行精确的运算操作,单击拖动将执行以下操作:
2D Mode: You may change the direction of the current terrain lighting in the preview area.
2D模式:你可以改变这个预览区域的灯光方向.
3D Mode: You may rotate and zoom the view to find a new viewing angle of the terrain. In addition, you may change the direction of the current lighting of the terrain.
3D模式:您可以旋转和缩放视图来找到一个新的地形的视角。此外,您可以更改当前地形的灯光的方向.
View Option Buttons:视图选项按钮
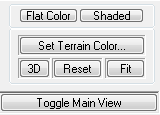
The three buttons right below the preview window allow you to change how terrains are shaded in World Machine:
预览窗口下方的三个按钮允许您去更改World Machine的地形的阴影:
●Height: Do not shade maps; Assign color by height only.
●高度: 没有阴影地图;仅能通过高度指定颜色.
●Shade: Shade by terrain features (diffuse lighting)
●阴影: 地形阴影特征(漫反射光照)
●H+S: Assign color by height and also shade the terrain features
●高度+阴影: 既可以制定高度颜色也可以显示地形阴影
●Set Terrain Color: Choose a color scheme for the terrain. This is a cosmetic choice only and will not affect the terrain in any way.
●设置地形颜色: 为地形选择一个颜色方案.这仅是一个化妆品的选择,这仅仅是一个表面的选择,不会以任何方式影响地形.
●2D/3D: This button toggles the preview window between 2D and 3D display modes.
●2D/3D: 这个按钮可以在2D和3D预览模式窗口之间切换.
●Reset Preview: Resets the lighting and camera angle of the preview window to default. Useful if you ever “get lost”.
●重置预览:重置预览窗口的灯光和摄影机的角度为默认状态.这对你来说是非常有用的,
●Fit: Automatically sets the zoom level of the preview to fit the terrain into the view.
●匹配: 自动设置缩放级别.以适应地形到视图中的预览
Toggle Main View: This button will toggle the display in the main window between the Device Workview and the last active Viewing mode. Right-clicking on any empty region in one of the other views will also accomplish this.
切换主视图:此按钮将显示在主窗口中切换与节点工作视图之间,最后主动查看模式
Water Level This section controls the optional water plane that WM can display to help you visualize a global water level that your application might use.
这部分是控制水平面,在你的应用程序可能使用的时候,WM会帮助你设想一个全球的水平面。
You can show or hide the waterlevel display by clicking the appropriate button. Either entering a value directly or moving the slider will allow you to change the waterlevel.
您可以显示或隐藏水位面的显示,通过单击相应的按钮.或者直接输入一个值或移动滑块来更改水平面的值.
Device Navigation Area节点导航区域
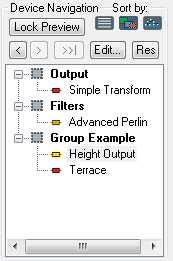
The device navigation list shows every device that exists in the current world. Devices are listed by either the creation order of devices or by groups. You can change the currently selected device by clicking on a new one; double-clicking will change that device’s properties.
这个节点导航列表可以显示当前世界中存在的节点.节点通过组或创建顺序被列出.您可以通过单击一个新的节点来更改当前所选的节点;通过双击可以改变节点的属性
Lock Preview on Device (f hotkey): This very useful function allows you to ‘freeze’ the preview window onto a device other than the currently selected one. For example, you may wish to freeze the preview onto a terrain filter device, and then go back up the chain and modify the settings of the generator device and see the filtered changes in real-time. Toggling the lock button again will disable the preview freeze.
锁定预览当前节点(快捷键F):这是一个非常有用的功能,你可以“冻结”此节点在预览窗口上,而不是当前选择的节点.例如,你希望冻结“filter”地形节点到预览窗口上,然后,返回节点链并修改“generator”节点的设置,你可以及时看到“filter”节点的改变.再次切换锁定按钮将取消预览锁定.
Move Backward: Changes the selected device to the prior device in the chain from the currently selected device.
后退: 将选定的节点更改为从之前选定的节点链中的现有节点.
Move Forward: Selects the next device in the chain from the current one.
前进:从当前节点链中选择下一个节点.
Move to End: Selects the LAST device in the chain from the current one.
移至最后:.从当前节点链中选择最后一个
Sort-By: Allows you to sort the device listing by either creation order, or grouping.
排序: 允许您对节点列的创建顺序进行排序或分组.
Edit...: Brings up the properties dialog for the currently selected device.
编辑...:呼出用于当前所选节点的属性对话框
5.2 3D View3D视图
The 3D View can be selected from the Command Bar, or by pressing F8.
通过F8键或命令工具栏来选择3D视图.
The 3D View will always show the current contents of the active terrain. If the currently selected device has not been built yet (displays a yellow rather than green light in the Workview), the 3D View will show the lower-resolution preview results rather than the full-detail build results.
3D视图总是显示当前活动地形的内容.如果当前选择的节点没有被创建(在工作视图中显示黄色灯而不是绿色的灯),3D视图显示的就是低分辨率的预览图而不是高精度的预览图.
The 3D View also has its own toolbar:
3D视图也有自己的工具栏:
Orbit: This button puts the 3D View into Orbit mode. In this mode, moving the mouse will orbit the view around the terrain. This mode makes it easy to inspect the terrain from a variety of angles.
轨道模式: 按此按钮将进入3D视图轨道模式.在这种模式下,移动鼠标将显示轨道周围的地形.
Free Look: The Free Look mode is similar to the traditional camera controls in WM 0.99. You can rotate the camera in any direction you want by left-clicking and dragging with the mouse; right-clicking and dragging up and down will move the camera vertically; and the arrow keys on the keyboard move the view in the direction you are facing. This allows you to freely navigate and inspect the terrain from wherever you wish.
自由预览:自由预览模式类似于传统的相机控制在WM 0.99版本中.你可以通过鼠标左键点击拖拽旋转摄影机来调整你想要的任意方向;右键点击上下拖拽可以垂直移动摄影机;或通过键盘上的箭头键移动视图在你面对的方向.
Reset View: This resets the current mode to its default rotation – useful if you’ve navigated somewhere strange and can’t find the terrain anymore!
重置视图:重置当前模式到默认有效角度,如果你导航到一些陌生的地方或再也找不到地形!
Snapshot Mode: The Snapshot more performs a "render" using Opengl at full terrain resolution. Typically terrains higher than 1024x1024 are rescaled down for display due to the millions of triangles produced. Snapshot mode lets you view the terrain in its fully detailed glory. Note that as soon as you move or adjust the view, it will revert back to the realtime display.
快照模式:快照最大程度使用Opengl渲染全地形的清晰度.通常由于超过比1014x1024更高的分辨率地形需要数百万个三角形产生,所以被降低显示.快照模式下,你可以查看其详细的壮丽地形.请注意,当移动或调整视图,它会还原到实时显示状态.
Detail Toggle: Turns detail texturing on or off. Using a detail texture can help give the terrain a better sense of scale, but you may wish to disable it in some instances to see the "true" terrain.
细节转换: 打开或关闭细节纹理.使用细节纹理可以帮助你更好的实现有比例感的地形,但在某些情况下,你如果不希望看到地形可以禁用"true"
5.3 2D View 视图
The 2D View can be selected from the Command Bar, or by pressing F9.
可以通过命令工具栏选择2D视图,或F9.
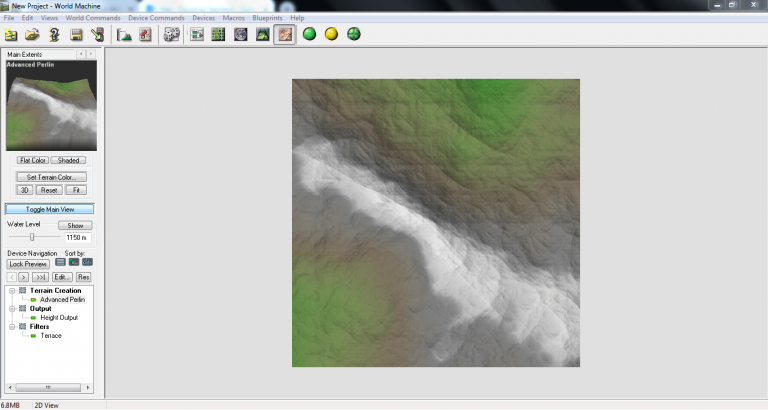
The 2D View offers you an overhead view of the terrain with optional shading applied to show the relief of the terrain. The 2D View does not use OpenGL or other 3D systems and so is a good viewing choice for very large maps, systems with slow 3D cards, or other conditions that favor 2D use.
2D视图为你提供一个俯视地形的可选项来用于减轻地形阴影的显示。该2D视图不使用OpenGL或者其他3D系统,因此对于系统较慢的3D卡,或有利于2D使用的其他条件来说.是一种理想的选择对于非常大的地行,
The 2D View offers very little interactivity. The display will update to reflect new sunlight conditions when you use the Leftside view to adjust the lighting. When the map is large enough to extend past the view boundaries, you can use the scrollbars to view different areas of the terrain.
2D视图提供的交互性很小.当你使用左侧视图来调整灯光时,显示将更新反射新的灯光条件.在地图足够大时,视图边界延伸过去,你可以使用滚动条来查看不同地区的地形.
5.4 Layout View布局视图
Layout View can be selected from the Command Bar, or by pressing F6.
从命令工具栏选择布局视图或F6.
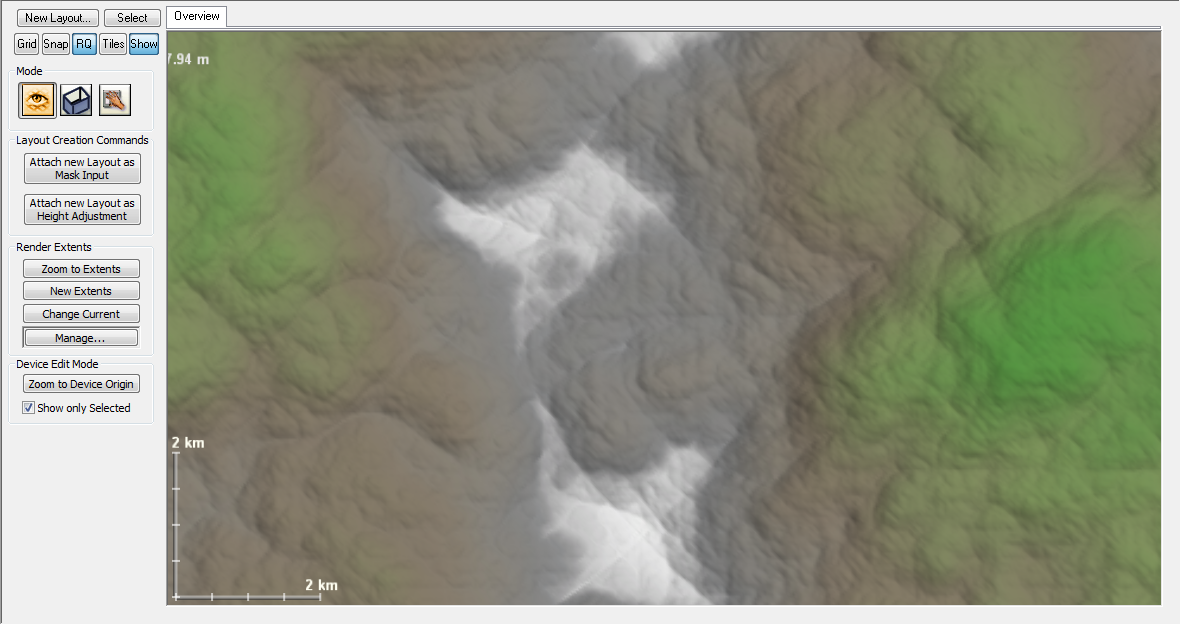
Layout View is extremely useful for planning out your world. Much like Explorer View, it displays terrain outside of the currently defined render extents. Layout View allows you to rapidly pan and zoom across the entire world, zooming in to view details at a range of a few meters, then pulling out to view many thousands of kilometers of terrain.
布局视图是非常有用的,可以规划出你的世界.像资源管理器视图,它显示当前定义之外的地形渲染范围.布局视图允许你快速扫视和缩放在整个世界里,放大可以查看在几米范围的详细信息,然后抽出来组成成千上万公里的地形.
A Note about Terrain Artifacts:
Layout and Explorer View can display any part of the entire virtual world, not just the render extents you designate. However, this ability means that some devices,in particular simulation-based devices such as Erosion, may not perform identically in these views as they do within the render extents. World Machine marks these devices with an optional warning symbol in the Device Workview. The warning symbol is a red exclamation point: "!" The severity of the problem depends upon the device and zoom level.
关于地形工件的一个注记:
布局和资源管理器视图可以显示整个虚拟世界的任何部分, 您指定的不仅仅是渲染范围. 然而, 这种功能意味着一些节点,特别是基于“仿真模拟”的节点,如侵蚀,可能这些命令不能同等的执行,因为它们在渲染范围内. World Machine 标记了一个可选择的警告符号在节点视图中. 这些警告符号是一个红色的感叹号: " !" 问题的严重性取决于节点的缩放级别.
In addition, Layout View provides a visual way to set and modify render extents, and manipulate certain devices that expose parameters to visual adjustment.
另外,布局视图提供了一个可视化的方式来设置和修改渲染范围和操作某些节点,直接进行可视化调整.
The most important use of Layout View, however, is in conjunction with a Layout Generator to edit shapes in the Shape View. Chapter 5 of this manual is devoted to using this incredibly powerful feature. We'll only slightly address this functionality here.
布局视图的使用是非常重要的,它可以在图形视图中与布局生成器共同使用,在第五章中,手册将要告诉你怎么不可思议的使用它.在这里我们仅仅做一个简单的功能性介绍.
Layout Generator Commands布局生成器命令
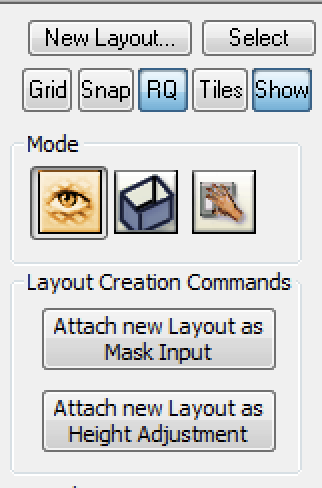
● New Layout: Creates a new Layout Generator and selects it into the view.
● 新建布局:创建一个新的布局生成器到视图.
● Select: Selects as the current device, the Layout Tab being displayed in the view.
● 选择:选择到当前节点,布局选项卡中显示的视图
● Attach Layout as Mask: Creates a new Layout Generator and attaches it to the mask input of the currently selected device. This action is not available if the selected device has no mask input.
● 附加布局为遮罩:创建一个新的布局生成器附加为遮罩输入当前选择的节点.如果当前的节点没有遮罩输入,那么此动作无效.
● Attach Layout as Height Adjustment: Attaches a Layout Generator to the output of the currently selected device. This action is not available if you are viewing a device with no output.
● 附加布局高度调整:布局生成器附加到当前所选节点的输出。如果你正在查看的节点没有输出,此操作不可用.
Common State Toggles常用状态切换
Clicking any of the buttons in the common function area will toggle their status on/off. The button state is remembered seperately for the Overview tab and the Layout tabs.
点击功能区域的任意一个按钮将要转换它们开/关的状态.按钮的状态可以分开这个预览选项和布局选项.
● Grid: Display of a grid atop the terrain
● 网格:在地形的上面显示网格
● Snap: Snap the mouse to the grid
● 快照: 对齐鼠标到网格
● RQ: Displaying the render extents
● RQ: 显示渲染范围
● Tiles: Show the render extent being used for tiled output, and show which areas of the terrain will be in which tile
● 瓷块:显示渲染范围用来输出瓷块, 并将瓷块作为地形的显示区域
● Show: Show or hide the display of terrain in the Layout View
● 显示:显示或隐藏地形布局视图.
Mode Buttons模式按钮
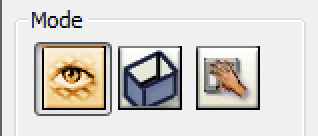
The three mode buttons control the operating mode while in the Overview.
这三个模式按钮控制这个操作模式的总览.
5.4.1 Overview Mode概览模式
Overview Mode is the default mode. You can perform no actions, merely pan and zoom around the terrain.
概览模式是默认模式.你可以不执行任何操作.只是扫视和缩放地形
5.4.2 Render Extent Mode渲染范围模式
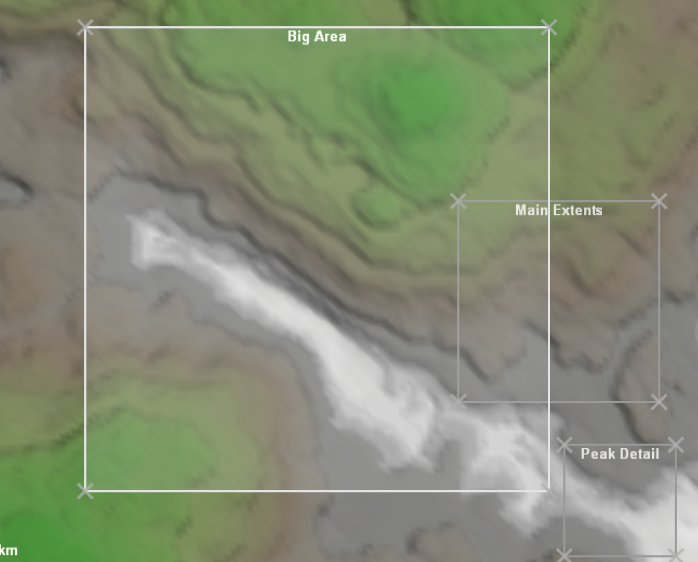
Render Extents Mode allows you to graphically add and manipulate your render extents.
渲染范围模式允许您以图形方式添加和操纵你渲染的范围.
Render Extent Manipulation渲染范围操作
While in Render Extents mode, all of the currently defined extents are visible at their appropriate locations in worldspace. You can click and drag on either the corners of the extent quadrant, or on the extent itself to change its size or location.
在渲染范围模式下,可以查看所有当前定义的程度在世界空间中的适当位置.您可以单击并拖动任一一个渲染象限的角
Render Extent Commands渲染范围命令
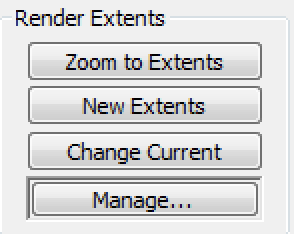
The following commands are available in Render Extent Mode:
以下命令在渲染范围模式下是可行的:
● Zoom to Extents: Brings into view the currently selected Render Extents
● 缩放到范围:将当前选定的范围显示为视图
● New Extents: Adds a new Render Extent to the world, that defaults to the same location as the currently selected one.
● 新范围:添加一个新的渲染范围到世界中.默认为与当前选定的同一个位置
● Set Current: Set the currently selected Render Extent by dragging a rectangle in the view.Once you finish the drag, the rectangle you defined is the new borders of the current Render Extent.
● 设定当前: 通过在视图中拖动一个矩形,设置为当前选定的渲染程度.一旦你完成拖动,您定义的矩形就是当前渲染范围的新边界.
● Manage...: Bring up the Project Setup dialog to precisely define the Render Extents.
● 管理...: 打开项目设置对话框来精确定义渲染范围.
5.4.3 Device Mode节点模式
Device Mode lets you manipulate certain device parameters visually that Devices in your world may expose.
节点模式可以使你直观操作某些节点参数.节点在世界中是公开的
.
There are two options on the Layout Overview Bar that are applicable to Device Mode:
布局工具栏有两个选项可用于节点模式:
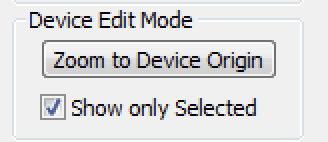
● Zoom to Device Origin: If the currently selected device supports a device origin, this button will zoom to its location. Only certain devices, principally Generators, have an origin.
●缩放到节点原点: 如果当前选择的节点支持节点原点,那这个按钮将要缩放到原点位置.只有某些节点,特殊的生成器有一个原点
● Show only Selected: When checked, you will only see controls (if any) from the currently selected device.
● 仅显示选择的:当选中时,你可以看到一些从当前选择的节点控制项(如果有).
5.5 Explorer View资源探索器视图
Explorer View can be selected from the Command Bar, or by pressing F7.
资源视图可以从命令工具栏中选择或按F7.
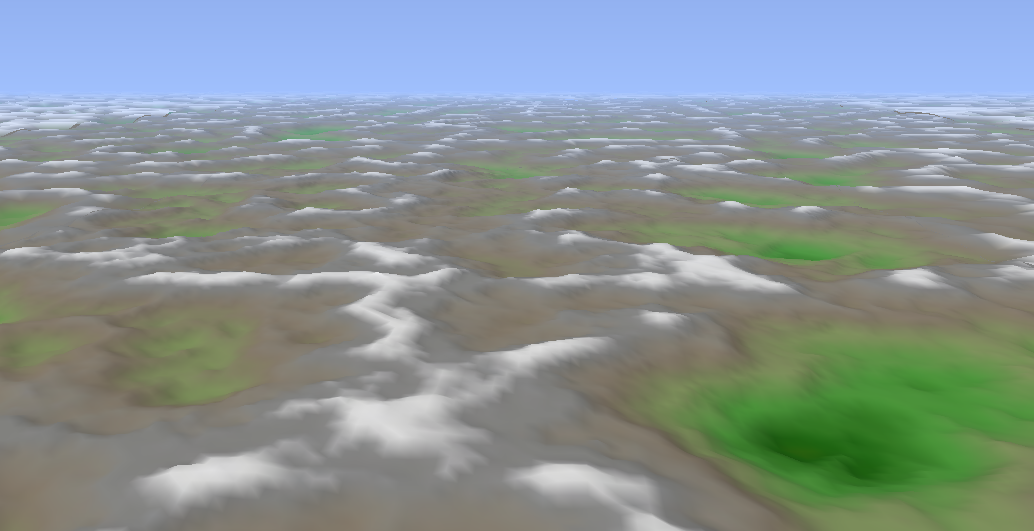
Explorer View allows you to easily explore the infinite world defined by the devices you placed into your World Machine world. Unlike the 2D and 3D views, you can see and travel over a representation of what the world looks like everywhere, not just within the render extent square. This is extremely useful for locating interesting areas of terrain in the current world defined by your device networks.
资源视图允许你轻松地探索所定义的节点在无限的世界中,与2D和3D视图不同.你可以游历你想看的任何地方,不仅是一个渲染的范围内部.这是非常有用的用于定位你最感兴趣的区域地形,在当前你的节点定义的网络世界中
5.5.2: Explorer Details资源探索器细节
What exactly Explorer mode looks like depends greatly upon the power of your computer system and the settings you selected in the Graphics Options dialog.
资源探索器模式看起来很大程度上取决于你的电脑系统和设置你的图形选项对话框中的选择.
.
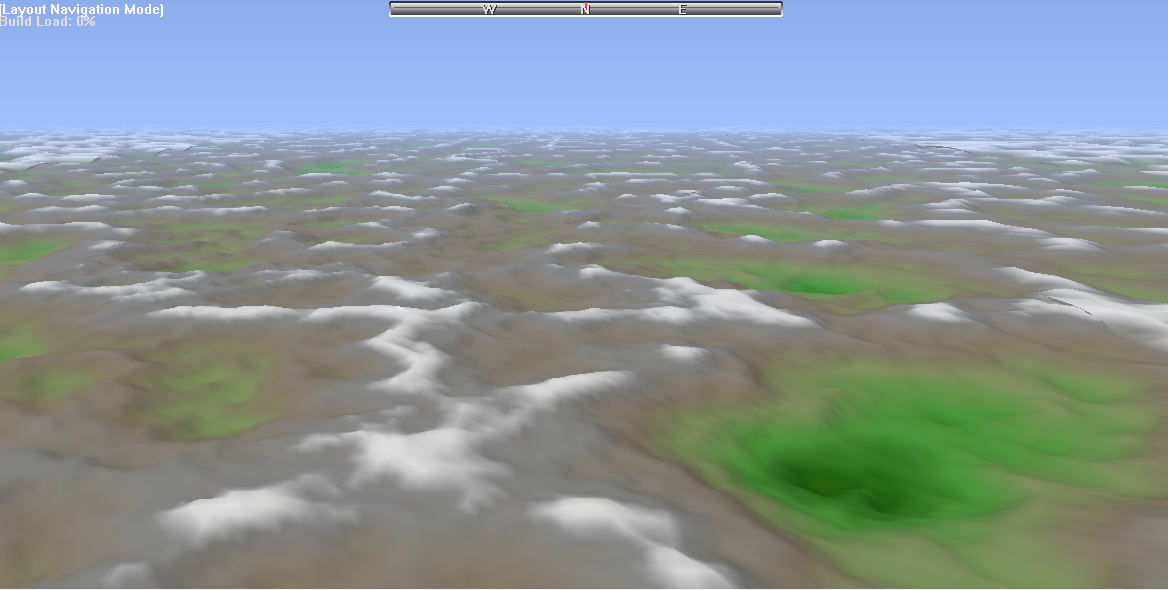
Explorer mode uses a refining progressive level of detail system. In non-technical terms, this means that the world starts out in very low detail, as seen on the left, and then is continuously refined so that nearby areas are shown with greater resolution, as on the right. In addition, beware that an old or underpowered system might be only able to run Explorer mode at a detail level equal to the left view above. A high-end computer with a powerful 3D card can look like the right side or better.You can see that in the upper middle of the screen, there is a compass; the red marker indicates the current view direction. North is in the middle, indicated by N; the extreme sides of the compass both represent south.
资源探索器模式使用一种改善的详细级别系统.在非技术条件下,这意味着,世界刚开始的时候细节很低,看这个左边,不断地使附近地区具有更大分辨率的显示在右边.此外,注意如果电脑性能不足,系统可能只能够运行探索器模式的左视图.更高端的电脑.你可以看到在屏幕的上部中间有一个指南针;红色标记表示当前视图方向.北在中间N表示;侧面都表示南
On the left, there are three lines of text. They indicate the current coordinates of the view along the x and y axis, the speed with which you are moving, and the build load. Although the first two are self explanatory, the build load is less obvious.
在左边,有三条线的文本。 他们指示当前视图沿x轴和y轴的坐标,你正在移动的速度,生成负载。虽然前两种是自我解释,生成负载不明显.
Build load: The percentage of time during the last second that Explorer mode has been actively building tiles. Thus, if this value is greater than 0%, tiles are currently being created that will increase the level of detail of the current scene.
构建加载:在最后一秒的时间的百分比,资源探索模式正在积极建设瓷块.因此,如果此值大于0,表示瓷砖目前正在创建的当前的场景增加的详细程度
5.5.3: Exploring Explorer!资源探索器!
To use Explorer mode, you can simply jump in and go! Explorer starts in "God's Eye" navigation mode. You can use the arrow keys and/or the drag the mouse on the landscape to move.
对于使用探索器模式,你可以随意在里面进退跳动!探索器开始在”上帝的眼“导航模式.你可以使用键或拖拽鼠标在景观上移动.
If you ever get lost, simply push the “View” button on the Explorer Toolbar. This will reset your current position so that you are looking at the current terrain render quad.
你过你丢失了方向.仅仅按一下探索器工具栏的 ”view“按钮,就会重置你的位置到默认位置,以便你查看现有地形的渲染四边
5.5.4: Explorer Toolbar探索器工具栏
The Explorer Toolbar is divided into two segments that deal with different aspects of Explorer. They are from left to right across the toolbar:
这个探索器工具栏换分为两段,处理不同特征的探索器.从左到右排列:
View Locations:视图位置
•View: Move the camera to bring the current render quad into view.
•视图:把摄像机移至使当前渲染的视野
•Jump: Jump to a particular location by specifying X/Y coordinates.
•跳转:通过指定x/y坐标跳转到一个特定位置.
Navigation Mode:导航模式
Each navigation mode uses the keys in a slightly different way:
每个导航模式中使用键的方式略有不同:
•God's Eye: Pan around the terrain by dragging it.
•上帝的眼:左右拖动地形.
o Dragging the terrain with the left mouse button moves the camera
o 使用鼠标左键拖动摄影机来移动地形
o Dragging up/down with the right button changes your elevation
o 使用鼠标右键拖动向上/向下改变你的高度
o Left + Right mouse buttons together change the current viewing angle
o 左+右鼠标按钮一起按更改当前视角
•Fly: Fly above the terrain.
•飞:在地形上方飞
o Up/down arrow controls speed
o 滚轮(或键盘)向上/向下箭头控制速度
o Left/right arrow AND/OR mouse controls heading and elevation
o 左/右箭头和/或鼠标控制航向和海拔
o Right mouse button + mouse up/down adjusts elevation
o 鼠标右键+鼠标向上/向下调整海拔
•Walk: Walk over the terrain.
•漫步:步行走过地形.
o Up/down arrow steps forward/back
o 向上/向下箭头前进/后退
o Left/right arrow sidesteps
o 左/右箭头横跨步
o Left mouse button + mouse left/right adjusts heading
o 鼠标左键+鼠标左/右调整航向
o Hold down the right mouse button to step forward
o 按住鼠标右键向前
•Drive: Drive around the terrain in a buggy.
•驾驶: 驾驶一辆马车穿越地形.
o Up/down arrow accelerates/brakes
o 向上/向下箭头/控制加速/减速
o Left/right arrow turns
o 左/右箭头转向
o Holding the ctrl key puts the buggy into “hover” mode
o 按住ctrl键把车放进"hover"模式
o Holding the shift key acts as a “turbo boost”
o 按住shift键施加为一个"涡轮增压"
5.5.5: Explorer Caveats探索器注意事项
Explorer Mode is a very powerful and useful feature. However, because of its demanding nature, it requires a lot from your computer system. Specifically: a fast CPU to generate terrain tiles, and a fast video card to display them. You will likely need to play with the quality presets in the Layout/Explorer Performance Options dialog to find a performance level acceptable for your system.
探索器器模式是一个非常强大而有用的特性.然而,由于其苛刻的性质.它需要大量的cpu资源从你的计算机系统中,具体来说:你需要一的快速的cpu和一个快速的视频卡来显示它们.你可能需要在布局/资源管理器中性能选项对话框来为你的系统找到一个可接受的性能级别
In addition, much like Layout View, some devices will cause visual artifacting within Explorer Mode! See the warning in section 5.4 for more information.
另外,像布局视图,某些节点将导致视觉残影在浏览器模式!更多信息,请参阅在5.4节的警告.